
What is SPLINTER SEARCH?
SPLINTER SEARCH ads are injected into all your web browsers, including Internet Explorer, Chrome, Firefox, Safari and Opera.
SPLINTER SEARCH ads can be identified by spotting a small text that is normally located above (top-right) or below (bottom-right) of the ads. The text will normally say "Ads by SPLINTER SEARCH". If SPLINTER SEARCH ads are served as pop-ups, you can identify them by spotting the URL in the pop-up window.
Will you remove it?
People say

What types of unwanted behavior do Ads by SPLINTER SEARCH exhibit?
Ads by SPLINTER SEARCH are intrusive and invasive, often displaying irrelevant and objectionable content. Sometimes, the user's default home page and/or search provider are substituted with pages serving SPLINTER SEARCH ads.
Ads by SPLINTER SEARCH can appear when you open a new tab in the browser. In these cases, sites with SPLINTER SEARCH ads will replace your default web page displaying when you open the browser, and deliver altered search results when you fire a search in the browser.
Some reports suggest that SPLINTER SEARCH ads may appear immediately after your computer starts up. If this is the case, the corresponding Web page was injected to autostart with a simple "explorer http://SPLINTER SEARCH" command.
SPLINTER SEARCH ads are often added to Web browser shortcuts on your computer's desktop, Start menu and/or the taskbar.
If this is the case, the browser shortcut will contain an altered command line to launch your default Web browser every time you want to open a new browsing session.
SPLINTER SEARCH ads can be launched without altering browser shortcuts by altering Windows Registry to specify a modified path to your default Web browser. This also results in SPLINTER SEARCH opening every time you launch a new browsing session.
Ads by SPLINTER SEARCH can be injected into Web pages by installing a signed netfilter driver sniffing your Web traffic and injecting the ads into HTML code of Web pages.
How SPLINTER SEARCH got on your computer?
Just as malware or potentially unwanted programs, ads by SPLINTER SEARCH get installed to your computer with browser toolbars, fake extensions and plugins (fake YouTube plugins, fake codec packs and fake "PC Cleaner" and "Windows Accelerator" type of products are among the most common), or simply downloaded with software obtained from suspicious sources.
In order to display SPLINTER SEARCH ads, some files are copied to your computer, some browser settings and/or registry keys are modified.
A browser toolbar, extension or plugin can be installed into your Web browser. In certain cases, existing browser plugins are infected by substituting manifest files or plugin source code.
Sometimes a new startup key is created to automatically launch SPLINTER SEARCH ads when your computer boots up. After installation, SPLINTER SEARCH ads begin showing up as ads, pop-ups, and banners on your computer or in your Web browser.
You have 2 ways to remove SPLINTER SEARCH:

 1. Remove Automatically.
 2. Remove Manually.
Why I recommend you to use an automatic way?
- You know only one virus name: "SPLINTER SEARCH", but usually you have infected by a bunch of viruses.
The UnHackMe program detects this threat and all others. - UnHackMe is quite fast! You need only 5 minutes to check your PC.
- UnHackMe uses the special features to remove hard in removal viruses. If you remove a virus manually, it can prevent deleting using a self-protecting module. If you even delete the virus, it may recreate himself by a stealthy module.
- UnHackMe is small and compatible with any antivirus.
- UnHackMe is fully free for 30-days!
Here’s how to remove SPLINTER SEARCH virus automatically:
STEP 1: Install UnHackMe (1 minute)
STEP 2: Scan for malware using UnHackMe (1 minute)
STEP 3: Remove SPLINTER SEARCH virus (3 minutes)
So it was much easier to fix such problem automatically, wasn't it?
That is why I strongly advise you to use UnHackMe for remove SPLINTER SEARCH redirect or other unwanted software.
How to remove SPLINTER SEARCH manually:
STEP 1: Check all shortcuts of your browsers on your desktop, taskbar and in the Start menu. Right click on your shortcut and change it's properties.
You can see SPLINTER SEARCH at the end of shortcut target (command line). Remove it and save changes.
In addition, check this command line for fake browser's trick.
For example, if a shortcut points to Google Chrome, it must have the path:
C:\Program Files (x86)\Google\Chrome\Application\chrome.exe.
Fake browser may be: …\Appdata\Roaming\HPReyos\ReyosStarter3.exe.
Also the file name may be: “chromium.exe” instead of chrome.exe.
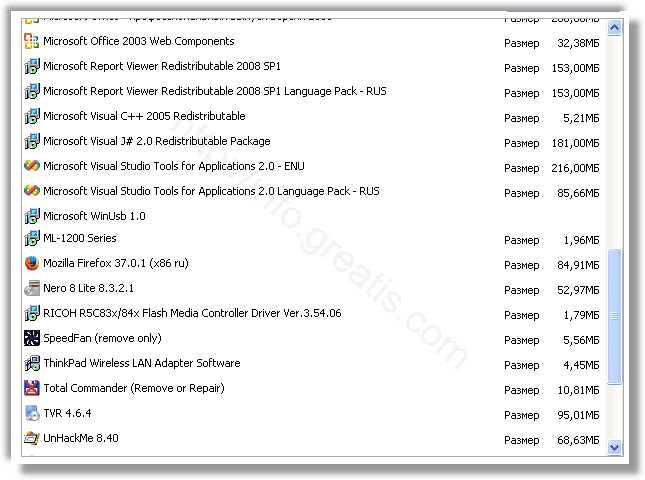
STEP 2: Investigate the list of installed programs and uninstall all unknown recently installed programs.
STEP 3: Open Task Manager and close all processes, related to SPLINTER SEARCH in their description. Discover the directories where such processes start. Search for random or strange file names.
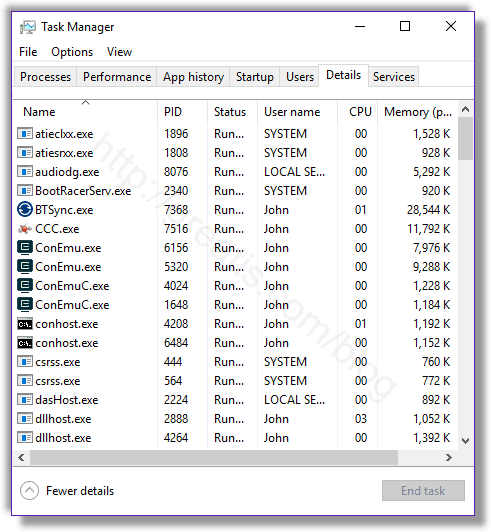
Remove SPLINTER SEARCH virus from running processes
STEP 4: Inspect the Windows services. Press Win+R, type in: services.msc and press OK.
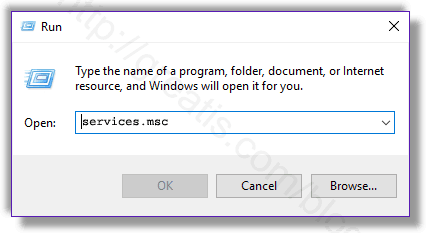
Remove SPLINTER SEARCH virus from Windows services
Disable the services with random names or contains SPLINTER SEARCH in it's name or description.
STEP 5: After that press Win+R, type in: taskschd.msc and press OK to open Windows Task Scheduler.
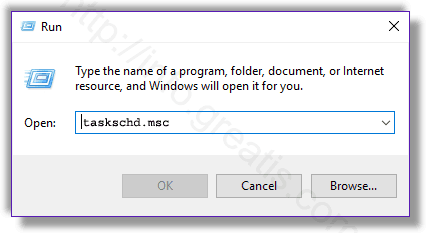
Delete any task related to SPLINTER SEARCH. Disable unknown tasks with random names.
STEP 6: Clear the Windows registry from SPLINTER SEARCH virus.
Press Win+R, type in: regedit.exe and press OK.
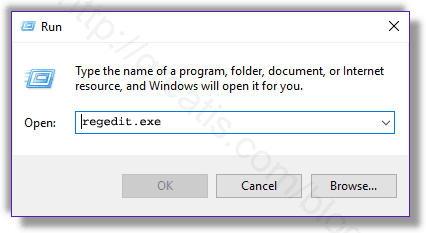
Remove SPLINTER SEARCH virus from Windows registry
Find and delete all keys/values contains SPLINTER SEARCH.
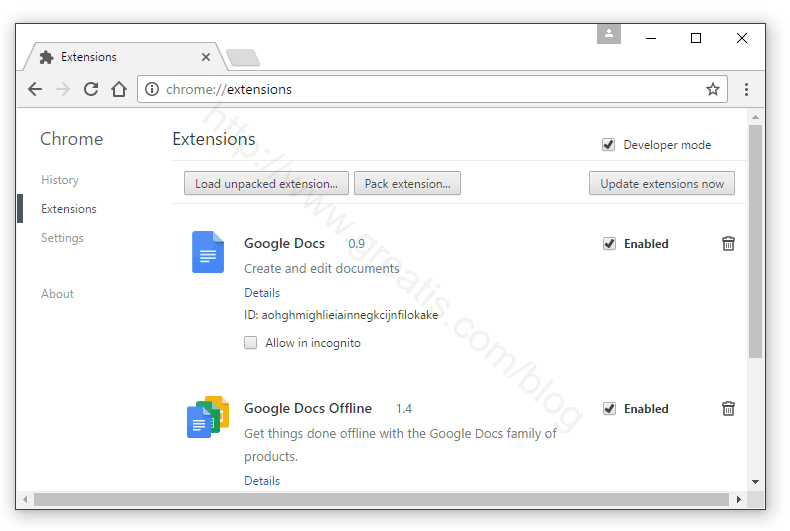
STEP 7: Remove SPLINTER SEARCH from Google Chrome.
STEP 8: Remove SPLINTER SEARCH from Internet Explorer.
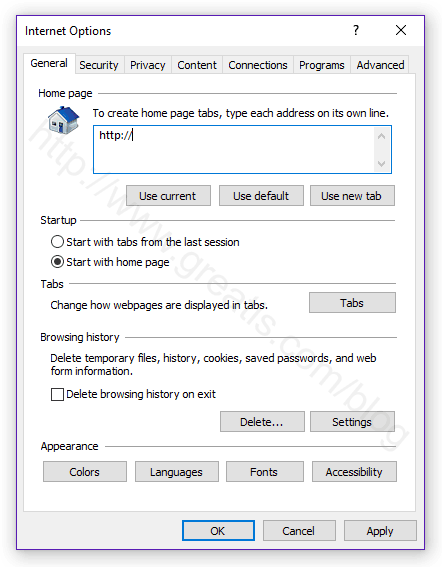
Set Internet Explorer Homepage
STEP 9: Remove SPLINTER SEARCH from Mozilla Firefox.
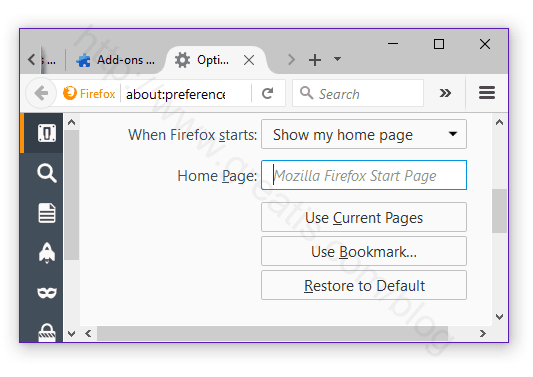
Change Firefox Home Page
STEP 10: And at the end, clear your basket, temporal files, browser's cache.
But if you miss any of these steps and only one part of virus remains – it will come back again immediately or after reboot.
I use UnHackMe for cleaning ads and viruses from my friend's computers, because it is extremely fast and effective.

STEP 1: Download UnHackMe for free
UnHackMe removes Adware/Spyware/Unwanted Programs/Browser Hijackers/Search Redirectors from your PC easily.

UnHackMe is compatible with most antivirus software.
UnHackMe is 100% CLEAN, which means it does not contain any form of malware, including adware, spyware, viruses, trojans and backdoors. VirusTotal (0/56).
System Requirements: Windows 2000-Windows 8.1/10 32 or 64-bit. UnHackMe uses minimum of computer resources.
STEP 2: Double click on UnHackMe_setup.exe
You will see a confirmation screen with verified publisher: Greatis Software.
Once UnHackMe has installed the first Scan will start automatically
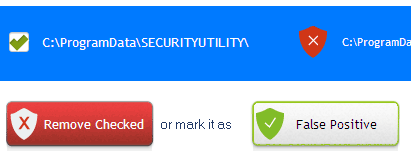
STEP 3: Carefully review the detected threats!
Click Remove button or False Positive.Enjoy!